Within the MyST Model editor, it is possible to add extra nodes to an existing environment. If your model is associated with a Pre-existing Infrastructure Provider (as opposed to an On-Demand Cloud Provider), you must ensure that the Host has already been registered within the Infrastructure Provider that is associated with the model.
To add an extra node, from the MyST Model editor.
- Click Edit Configuration
- In the tree view, click the + icon next to Nodes for the given Compute Group which you wish to scale up.
- You will receive a prompt to Add New Compute Node. Enter a name, select your host, then click OK.
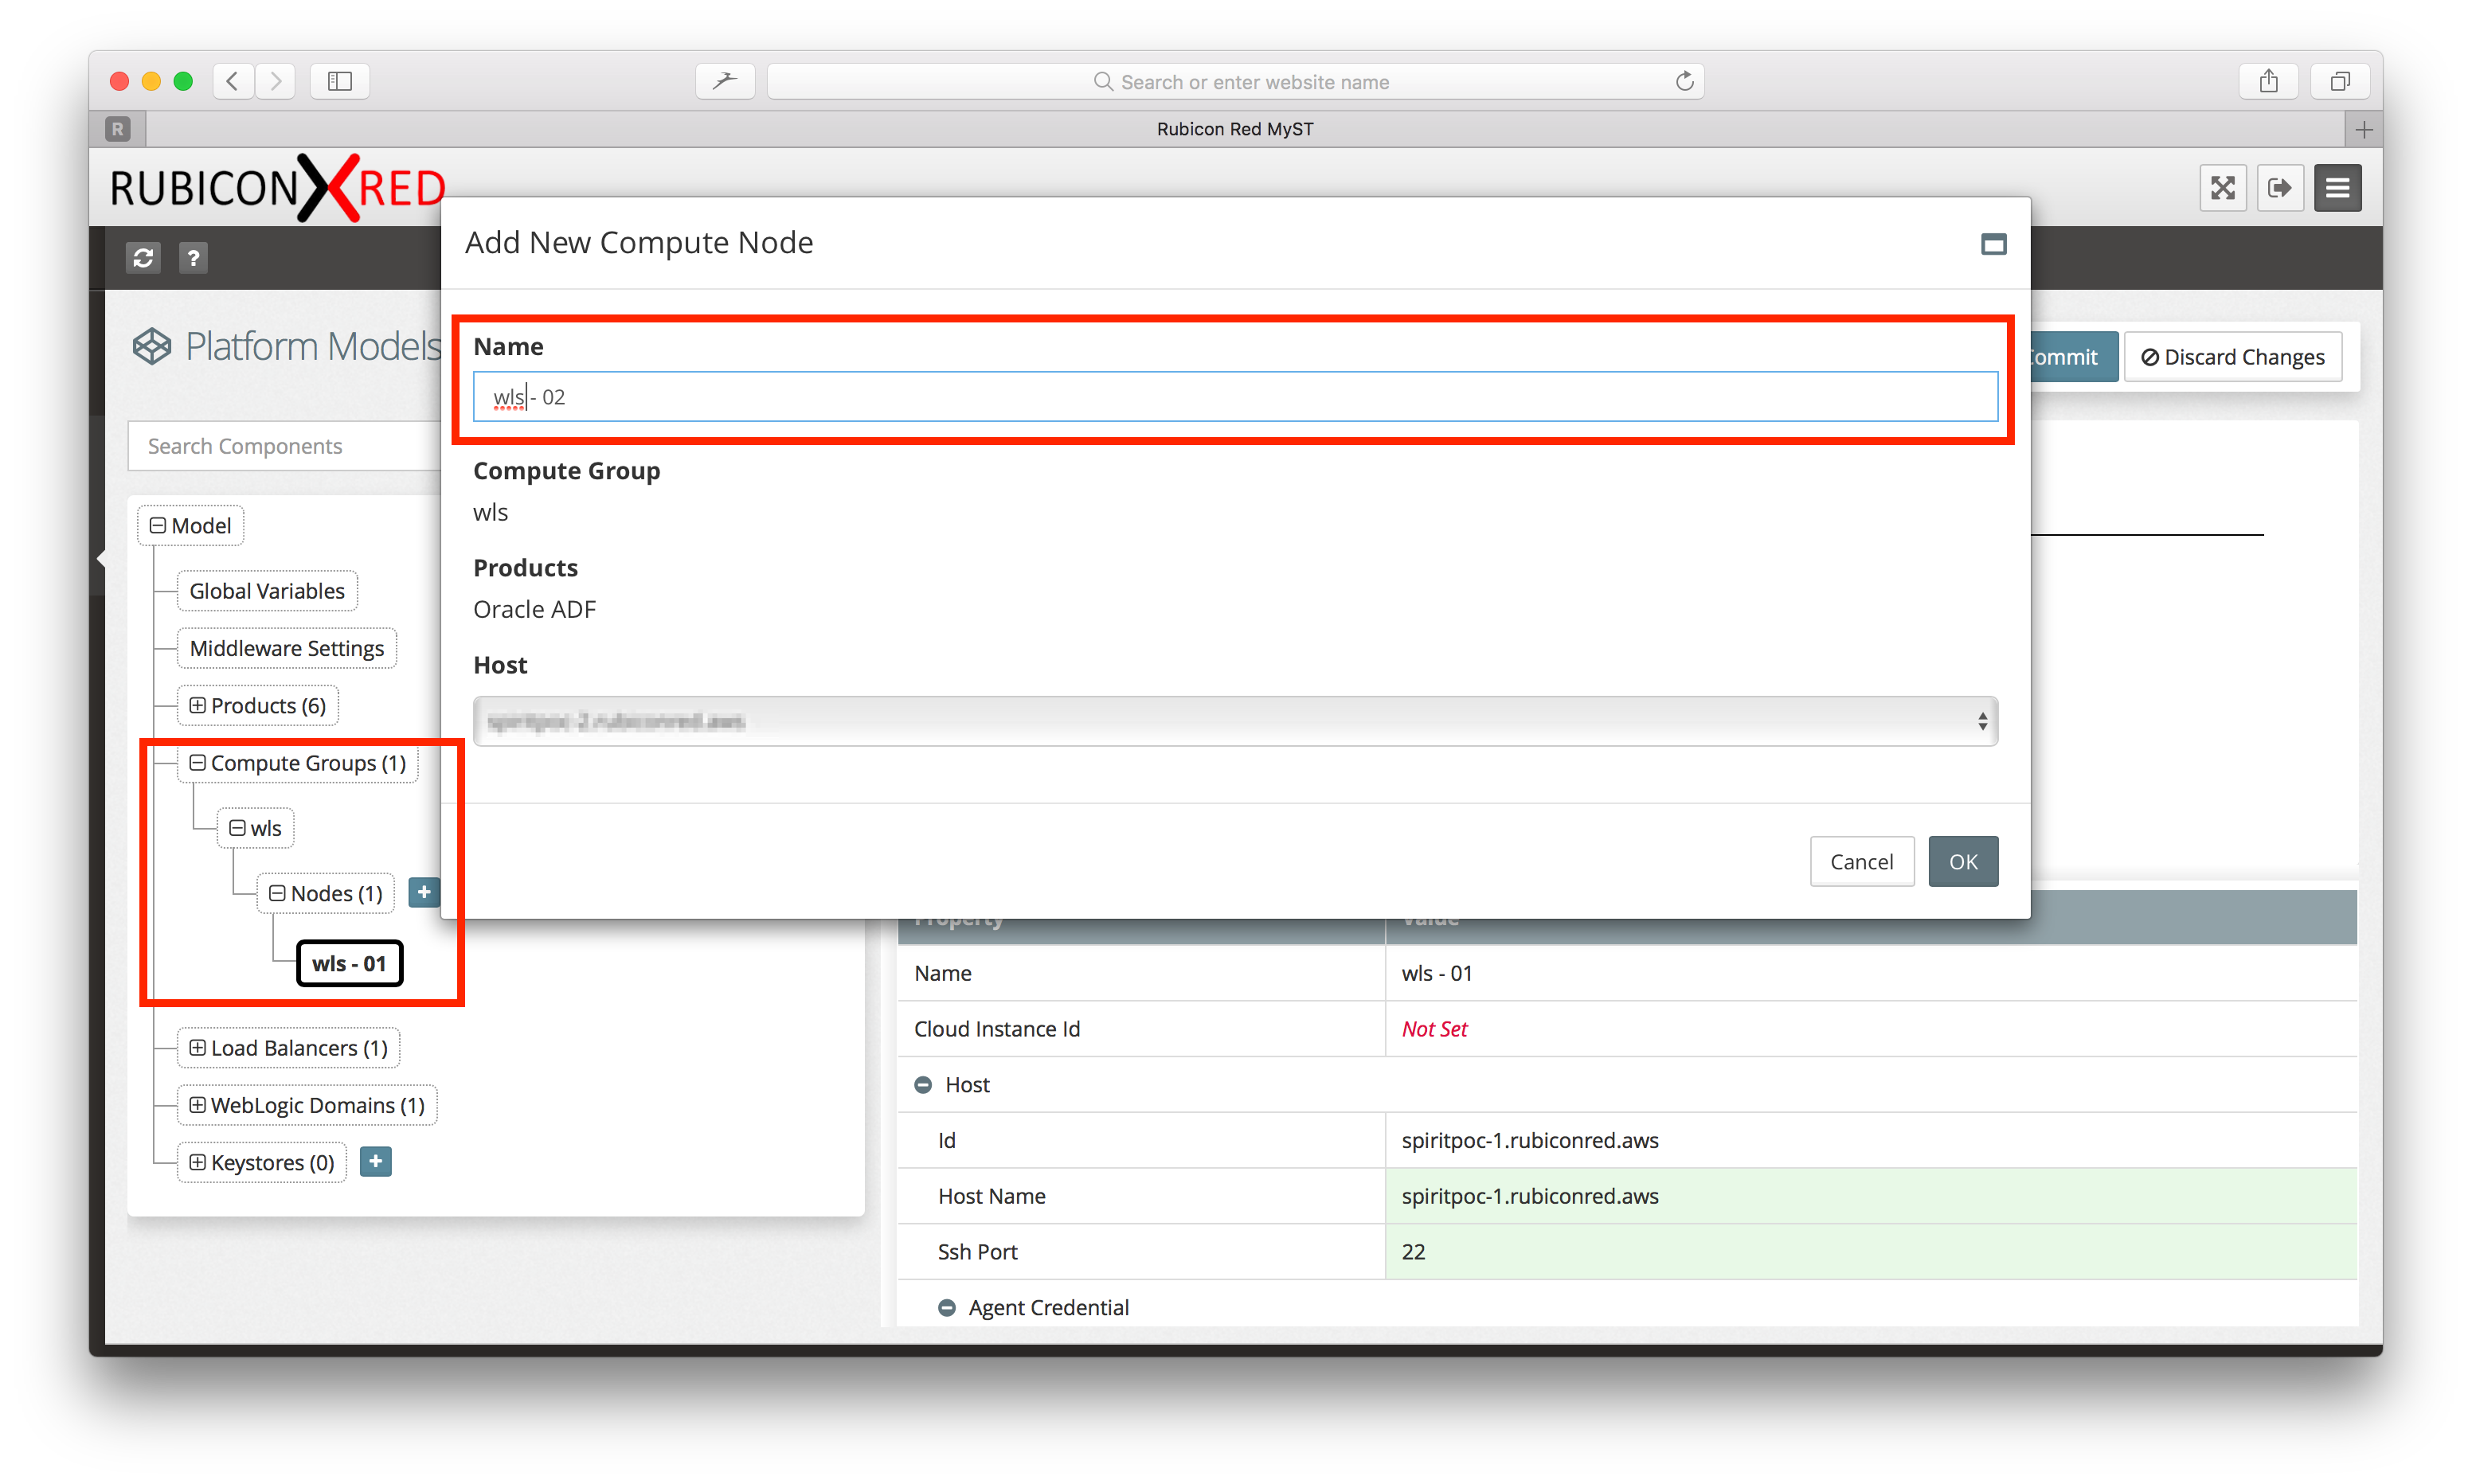
- You will see the new Compute Node appearing in the Topology view similar to the picture below.

- Click Save to compute the details for the second node.

- If you are happy with the rest of the configuration, choose Save + Commit. You can also enter a meaningful commit message at this point.
You are now ready to add your extra node. The cleanest and simplest way to add the extra node is to re-provision your whole environment, however, if you cannot do this, you can alternatively update the existing environment with the extra node. The steps below show how to do that.
Firstly, we Update our environment with the new node details. This is an option under the Actions menu for our Platform Instance. If you wish to play it safe you can also do a Dry Run first to see what MyST is going to apply to the existing WebLogic domain. In the case of a Dry Run it will connect to the running instance as if it is doing the update but not apply any of the actual changes. Then, once this is completed, we can click on View under the Execution Log and we will see a tree of all the changes it would apply similar to the picture below.
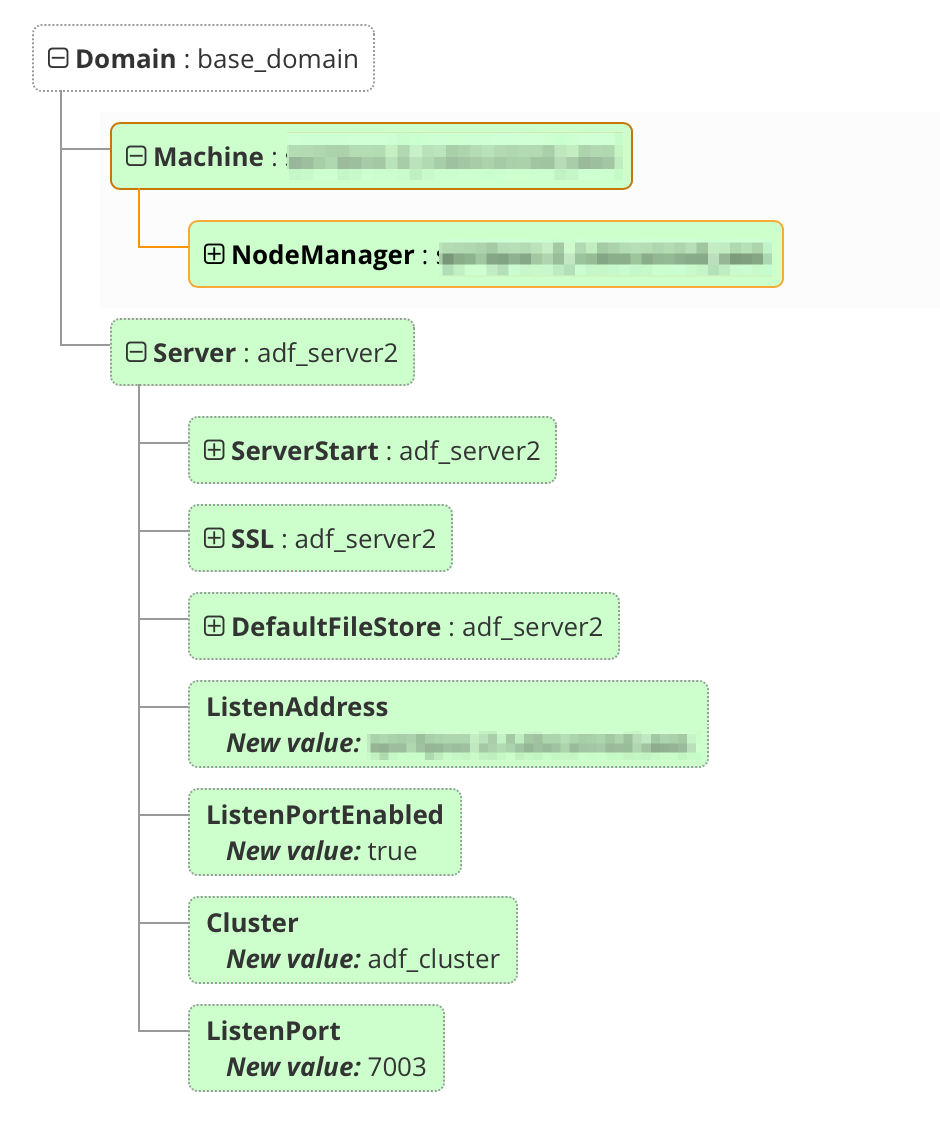
After you have applied the real Update (i.e. no Dry Run) you should see something in the logs similar to the following: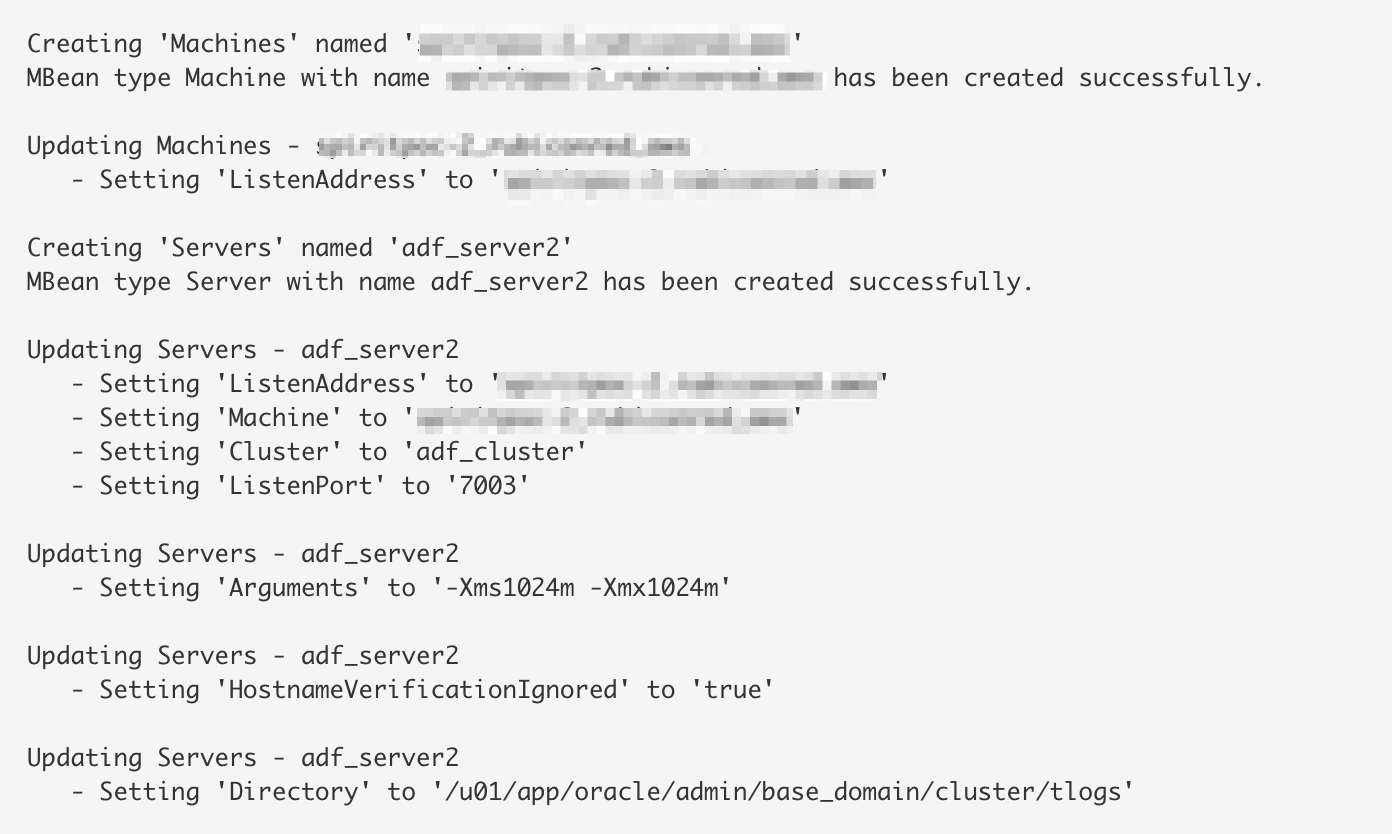
Also, when you login to the WebLogic Admin Console, you should see the extra node available under the Machines. You can get to the WebLogic Admin Console by clicking View instance details then clicking on the link next to Admin Console.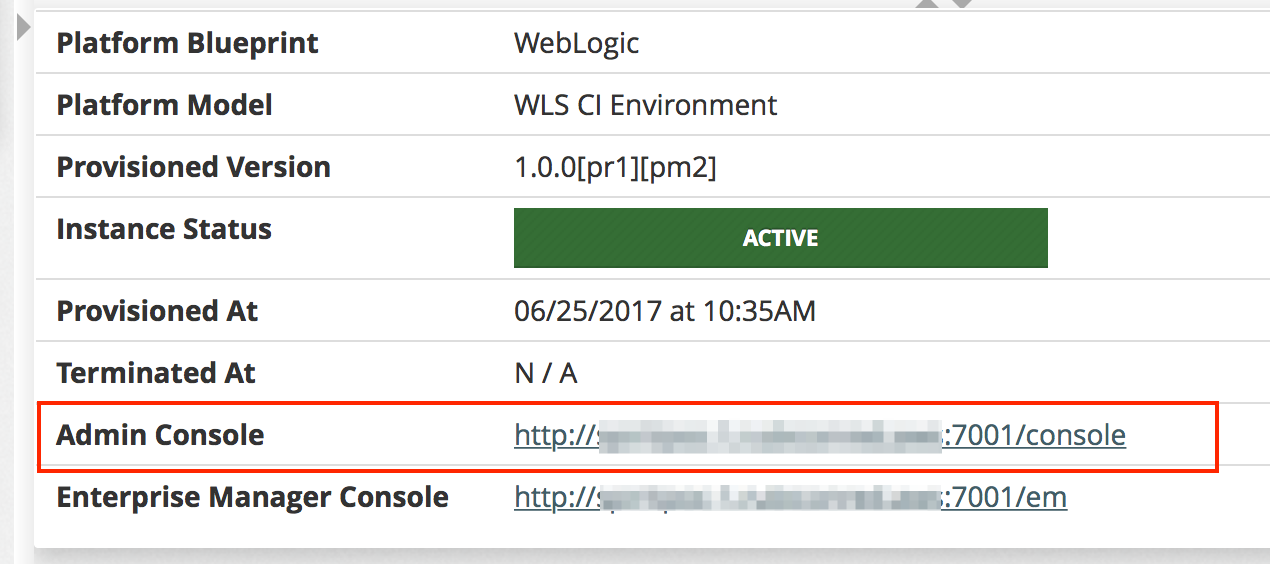
If your domain is on shared storage, all your need to do is start your new node up, however, if you have a separate copy of the domain home on each box, you will need to make sure that you synchronise this first before starting up the new node. the domain synchronisation can be done with the standard WebLogic pack/unpack scripts or via the MyST copy-domain action. When you are ready to start your new node and all of the managed servers associated with that, simply go to Control and select Start.
 After this completes, you should be able to login to your WebLogic admin console and see that all the nodes are running.
Did you know: The GUI options shown above can be automated using the REST APIs. This can be especially useful if you wish to dynamically scale up or down based on events. If you require support on this, please raise a ticket with MyST Support.